

I got a coffee tree for a birthday a few years ago and after letting it languish in a pot for too many moons, we moved it into the garden whereby it did decide to live and grew really well. I harvested the cherries, extracted the beans and got them to the "green bean" stage (link to this post here) From there, all I have to do is roast the beans, grind them and turn them into coffee - That's what this post is about!
Here's what I did...

I ended up doing all this at a café owned by a friend under the watchful eye of her Barista as I'm not a coffee drinker and don't have a clue how its all meant to end up! We decided to roast the beans on the stove top as it was easier to control and we could see (and photograph) and control every step of the way.

With the pot on a gas cook top set to a medium heat, we constantly stirred the beans to make sure we were getting an as even roast as possible.


After we had reached a roast we were happy with - which was by no means anything like the dark black colour of a commercial roast - we left them to cool. We were worried that we might burn them and felt a lighter roast would be better than burnt beans for our first attempt. (The above picture is at about the half way mark.)
"Roasting coffee transforms the chemical and physical properties of green coffee beans into roasted coffee products. The roasting process is what produces the characteristic flavor of coffee by causing the green coffee beans to change in taste. Unroasted beans contain similar if not higher levels of acids, protein, sugars, and caffeine as those that have been roasted, but lack the taste of roasted coffee beans due to the Maillard and other chemical reactions that occur during roasting." Wikipedia 2016

This is when I discovered that I hadn't got the husk off that I thought I had. This meant that there was a lot of fuzzy skin starting to float around in amongst the beans. The Barista, having never seen this before, decided it was a bad thing and he then sat and peeled every last bean for me in between making coffees for other people ( I was not so popular at this point... :( )

So in the last post where I advocated that you might want to hull them or take off the skins (but I didn't) - turns out to be that its probably not really an optional step - and its very time consuming as I discovered!!

So now we had a much lighter roast, my Barista reckoned it was a "blond" or very light roast and it would have more caffeine in it than a darker roast. I found this great roasting chart on Wikipedia (below) along with other really good information for those who like this sort of information. Based on this chart I reckon mine is a Cinnamon or light roast.
After the roasting - the next step is the grinding. I'm lucky that I know some one who owns a café and was happy for me to hijack her barista and equipment for a few hours in the afternoon... If you are not so lucky, make friends with a small café owner who loves their coffee and ask them how they would feel about using their grinder to put a batch of your coffee through. If that's not an option for you, I'm guessing there is plenty of grinders available in the retail world (or even in your own cupboard if you are a coffee gourmand already!)

We emptied out the grinder of the usual Aussie grown café coffee and popped in my paltry bean quantity. Then we hit the grind button and, presto! out came my freshly ground coffee!!!

Great fun! - Now we needed to make a cup of coffee from it and this is where its good to have an expert (and all that fancy equipment!)


So there it is - about to go into the machine. Its much, much lighter than a commercial roast and looks totally different.


Once it was mixed in with some frothed milk (and a lot of sugar) I enjoyed my very own home grown, hand picked, home processed, café roasted and ground cup of coffee flavoured warm sweet milk to the amusement of the "real coffee" drinkers! (I'm so never gonna make a good barista!)
There turned out to be about 150gm of ground coffee after all that hard work and so I have packaged it into a tin and sent it to the one person in the world who will appreciate all that hard work and dedication - My Mother! Happy Birthday Mom!!

After all that work, I fully intend to do all this again next season and learn from the lessons of this year. I will work on the hulling step after I have dried the beans and I think I'll go for a darker roast next time just to see what that's like. Its probably not going to make any difference to the fact I don't like the bitterness of coffee but as long as that tree is producing I can bombard my poor long suffering mother with tins of home made coffee for years to come!
The roasting can be easily done at home in a thick bottomed frying pan or roasting dish in the oven. I also heard about using a popcorn machine but haven't tried it!
If you don't have a grinder you will need to buy one or chat up the local café staff to get it ground, after that you keep it air tight and in the fridge until you use it as per normal coffee.
So far it seems as if coffee processing is open to a lot of experimentation. I have read about putting butter and sugar on the beans before roasting them for additional flavour, you can add spices to coffee after its ground to make flavoured coffee (eg cinnamon, cloves, cardamom) and I have since discovered there are special coffee flavourings you can add to the ground coffee make more exotic concoctions like Mocha, vanilla or hazelnut coffees. I'm beginning to think the sky is the limit in the coffee world!
Let me know what you think!
Score card:
Green-ness: 5/5 for knowing exactly where your coffee is coming from
Frugal-ness: 5/5 for growing your own food! Once you have paid for the tree, it really just your labour...
Time cost: 1 year to grow the cherries, 1/2 an hour to pick, 3-4 days to process, 1 hour to roast, 10 seconds to grind, 30 seconds to brew, 15 minutes to drink - ahh... time well spent!
Skill level: Fairly basic - I think a love of coffee would help though!
Fun-ness: Really quite a lot of fun to see how much work goes into a single cup of coffee!!
Here's what I did...

I ended up doing all this at a café owned by a friend under the watchful eye of her Barista as I'm not a coffee drinker and don't have a clue how its all meant to end up! We decided to roast the beans on the stove top as it was easier to control and we could see (and photograph) and control every step of the way.

With the pot on a gas cook top set to a medium heat, we constantly stirred the beans to make sure we were getting an as even roast as possible.

It took a surprisingly long time for the beans to colour up. May be an hour all up - we chose not to hurry as there was such a small quantity of beans we would have nothing if we burnt them! When you hear the "crack" you have reached the stage of the lightest roasts. If you continue to roast through to a second "crack" you are in the dark stages of the roast and the bean flavour may be taken over by roast flavours - not a bad thing, just personal preference as to how you like your coffee!

After we had reached a roast we were happy with - which was by no means anything like the dark black colour of a commercial roast - we left them to cool. We were worried that we might burn them and felt a lighter roast would be better than burnt beans for our first attempt. (The above picture is at about the half way mark.)
"Roasting coffee transforms the chemical and physical properties of green coffee beans into roasted coffee products. The roasting process is what produces the characteristic flavor of coffee by causing the green coffee beans to change in taste. Unroasted beans contain similar if not higher levels of acids, protein, sugars, and caffeine as those that have been roasted, but lack the taste of roasted coffee beans due to the Maillard and other chemical reactions that occur during roasting." Wikipedia 2016

This is when I discovered that I hadn't got the husk off that I thought I had. This meant that there was a lot of fuzzy skin starting to float around in amongst the beans. The Barista, having never seen this before, decided it was a bad thing and he then sat and peeled every last bean for me in between making coffees for other people ( I was not so popular at this point... :( )

So in the last post where I advocated that you might want to hull them or take off the skins (but I didn't) - turns out to be that its probably not really an optional step - and its very time consuming as I discovered!!

So now we had a much lighter roast, my Barista reckoned it was a "blond" or very light roast and it would have more caffeine in it than a darker roast. I found this great roasting chart on Wikipedia (below) along with other really good information for those who like this sort of information. Based on this chart I reckon mine is a Cinnamon or light roast.
| Unroasted | |||
| 22 °C (72 °F) Green Beans Green coffee as it arrives at the dock. They can be stored for approximately 12-18 months in a climate controlled environment before quality loss is noticeable. | 165 °C (329 °F) Drying Phase During the drying phase the beans are undergoing an endothermic process until their moisture content is evaporated, signifying first crack. | ||
| Light roast | |||
| 196 °C (385 °F) Cinnamon Roast A very light roast level which is immediately at first crack. Sweetness is underdeveloped, with prominent toasted grain, grassy flavors, and sharp acidity prominent. | 205 °C (401 °F) Light Roast Moderate light brown, but still mottled in appearance. A preferred roast for some specialty roasters, highlights origin characteristics as well as complex acidity. | ||
| Medium roast | |||
| 210 °C (410 °F) American Roast Medium light brown, developed during first crack. Acidity is slightly muted, but origin character is still preserved. | 219 °C (426 °F) City Roast Medium brown, common for most specialty coffee. Good for tasting origin character, although roast character is noticeable. | ||
| Dark roast | |||
| 225 °C (437 °F) Full City Roast Medium dark brown with occasional oil sheen, roast character is prominent. At the beginning of second crack. | 230 °C (446 °F) Vienna Roast Moderate dark brown with light surface oil, more bittersweet, caramel flavor, acidity muted. In the middle of second crack. Any origin characteristics have become eclipsed by roast at this level. | ||
| 240 °C (464 °F) French Roast Dark brown, shiny with oil, burnt undertones, acidity diminished. At the end of second crack. Roast character is dominant, none of the inherent aroma or flavors of the coffee remain.[7] | 245 °C (473 °F) Italian Roast Nearly black and shiny, burnt tones become more distinct, acidity nearly eliminated, thin body.[8] | ||


After the roasting - the next step is the grinding. I'm lucky that I know some one who owns a café and was happy for me to hijack her barista and equipment for a few hours in the afternoon... If you are not so lucky, make friends with a small café owner who loves their coffee and ask them how they would feel about using their grinder to put a batch of your coffee through. If that's not an option for you, I'm guessing there is plenty of grinders available in the retail world (or even in your own cupboard if you are a coffee gourmand already!)

We emptied out the grinder of the usual Aussie grown café coffee and popped in my paltry bean quantity. Then we hit the grind button and, presto! out came my freshly ground coffee!!!

Great fun! - Now we needed to make a cup of coffee from it and this is where its good to have an expert (and all that fancy equipment!)


So there it is - about to go into the machine. Its much, much lighter than a commercial roast and looks totally different.

Here is comes! The first brewing of my first coffee crop!

It held the crema well and made a light brew, as expected.
The coffee drinkers all had a sip and decreed it quite good, light but good (did I detect a note of surprise??) I wasn't so chuffed, but then I'm not a coffee drinker so that wasn't a surprise!

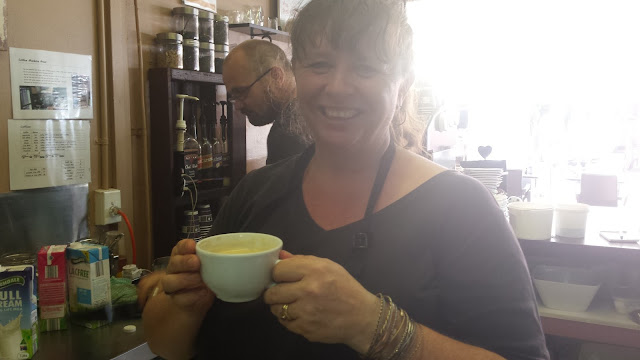
Once it was mixed in with some frothed milk (and a lot of sugar) I enjoyed my very own home grown, hand picked, home processed, café roasted and ground cup of coffee flavoured warm sweet milk to the amusement of the "real coffee" drinkers! (I'm so never gonna make a good barista!)

There turned out to be about 150gm of ground coffee after all that hard work and so I have packaged it into a tin and sent it to the one person in the world who will appreciate all that hard work and dedication - My Mother! Happy Birthday Mom!!

After all that work, I fully intend to do all this again next season and learn from the lessons of this year. I will work on the hulling step after I have dried the beans and I think I'll go for a darker roast next time just to see what that's like. Its probably not going to make any difference to the fact I don't like the bitterness of coffee but as long as that tree is producing I can bombard my poor long suffering mother with tins of home made coffee for years to come!
The roasting can be easily done at home in a thick bottomed frying pan or roasting dish in the oven. I also heard about using a popcorn machine but haven't tried it!
If you don't have a grinder you will need to buy one or chat up the local café staff to get it ground, after that you keep it air tight and in the fridge until you use it as per normal coffee.
So far it seems as if coffee processing is open to a lot of experimentation. I have read about putting butter and sugar on the beans before roasting them for additional flavour, you can add spices to coffee after its ground to make flavoured coffee (eg cinnamon, cloves, cardamom) and I have since discovered there are special coffee flavourings you can add to the ground coffee make more exotic concoctions like Mocha, vanilla or hazelnut coffees. I'm beginning to think the sky is the limit in the coffee world!
Let me know what you think!
Score card:
Green-ness: 5/5 for knowing exactly where your coffee is coming from
Frugal-ness: 5/5 for growing your own food! Once you have paid for the tree, it really just your labour...
Time cost: 1 year to grow the cherries, 1/2 an hour to pick, 3-4 days to process, 1 hour to roast, 10 seconds to grind, 30 seconds to brew, 15 minutes to drink - ahh... time well spent!
Skill level: Fairly basic - I think a love of coffee would help though!
Fun-ness: Really quite a lot of fun to see how much work goes into a single cup of coffee!!
Comments
Bond cleaning
End of lease cleaning Newtown
End of lease cleaning Botany