

I just found the photos of the invitations for the 50th Birthday party we went to recently and thought I would share the process with you.
I love handmade individual invitations and get a bit of a buzz out of making them. These ones I tried not to make to "girly' as they were for a gentleman's big day so I was aiming for simple, winter, slightly Christmas-y with a bit of a sparkle.
These ones are nice and simple and could be adapted to any slightly more formal occasion or brightened up for less formal ones!
Here's what I did...


Score card:
Green-ness: 3/5 Making invites is greener than buying them but plastic is defiantly not green. Waste plastic would have been ok but buying plastic for a project is not.
Frugal-ness: Reasonably cheap as the parts were $2 each and I made over 20 of these with bits left over for other projects. (Plastic table cloth $2, Doilies $2 Wrapping paper with 50 on it $2. Each A4 paper .84c)
Time Cost: Around an hour and a half. Once you know what you want to do - its pretty quick.
Skill level: Once again - cutting and pasting (Two of my favourite activities!)
Fun -ness: Great fun to make and even more fun when the birthday boy approved!
I love handmade individual invitations and get a bit of a buzz out of making them. These ones I tried not to make to "girly' as they were for a gentleman's big day so I was aiming for simple, winter, slightly Christmas-y with a bit of a sparkle.
These ones are nice and simple and could be adapted to any slightly more formal occasion or brightened up for less formal ones!
Here's what I did...

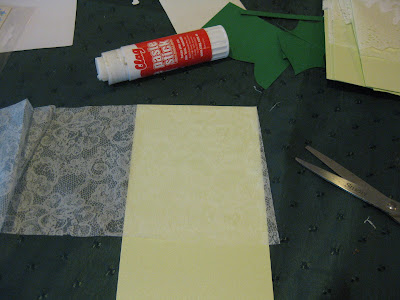
First - cut your card to the shape of your envelope. You should be able to get three slices out of an A4 card that fit into a standard business envelope. Choosing a size that has a standard envelope saves a lot of tears (and cost at the Post Office) later on.

There are a "Christmas in July" themed invite with a "snow/cold' feel to them - The background I am using is a plastic $2 tablecloth I got from Crazy Clarkes. I have chopped it up and used it for many things...
I glued on a piece that went roughly 2/3 of the way down.

Then I cut paper doilies in half and glued them on as well.

And then added a handmade snowflake over the top giving layers of white on white on frosted light green for that frosted snowy winter feel.

I cut (ok I got my sick husband to cut) out all these 50's from some wrapping paper. I would have preferred silver but I simply couldn't find any. I thought silver would go better with the white - but this looked fine in the end.

I turn my invitations into a production line to make sure that I have enough bits and pieces to finish as many invites as I need (plus a few more... You always end up needing more)

Then I cut out the parts for the wording on the front. Again, layers on layers...

Giving me this sort of effect.

And once they are all together - this is what I ended up with!
Like snowflakes, they were all individual as they were all handmade with a different snowflake on each one. All the info for the party was simply typed up on the computer and stuck to the back with a border around it to show the colour of the invite. The table was done up in greens and whites and place tags were just a variation on the part that says "celebrate" on the invitation.
If I was going to do a jazzy, more colourful version of these, I would try painting or dying the doilies a bright colour as well as using brighter backgrounds. I know you can get gold and silver doilies which would be fun to use as well.
The link I used to learn to make six sided paper snowflakes is here and the page I used to get ideas for snowflake shapes is here.
Happy Invitation making!
Green-ness: 3/5 Making invites is greener than buying them but plastic is defiantly not green. Waste plastic would have been ok but buying plastic for a project is not.
Frugal-ness: Reasonably cheap as the parts were $2 each and I made over 20 of these with bits left over for other projects. (Plastic table cloth $2, Doilies $2 Wrapping paper with 50 on it $2. Each A4 paper .84c)
Time Cost: Around an hour and a half. Once you know what you want to do - its pretty quick.
Skill level: Once again - cutting and pasting (Two of my favourite activities!)
Fun -ness: Great fun to make and even more fun when the birthday boy approved!
Comments
Cheers xxxx
Alice
End of lease cleaning Barangaroo
BBQ cleaning Balmain