

Last year two friends and I hosted an afternoon tea party which was a lot of fun. This year, despite the constant rain, we decided to host another one. Which meant that I got to play and make some wonderful invitations. I saw some on the net that inspired these, but mine turned out totally different - great but nothing like the ones I had seen!
Anyway, these ones are very easy, very cheap and very nice into the bargain!

Here's what I did...


Score card:
Green-ness: 3/5 Its probably greener to send an email invite. Also used new products that probably cant be used again for anything else.
Frugal-ness: 5/5 Cost me $2 for the doilies and $4 for the ribbon. I thought $6 for 24 handmade invitations was ok!
Time cost: Maybe 4 hours from whoa to go. I made them in about 3 spurts of just over an hour each.
Skill level: The invitation is easy enough, getting the printed piece in the right place too a fair bit of computor skill. Although once you've got it, you can save it, change the details and use it again.
Fun-ness: This was a wonderful project - I enjoyed every step of it!
Anyway, these ones are very easy, very cheap and very nice into the bargain!

Here's what I did...

First I bought a pack of 24 rectangle paper doilies (aprox A5 size) for $2 at my local cheap shop.

Then I made up some fairly strong tea and let it go cold - next time I think I would be more subtle and use less tea. As it drys and ages it gets darker. So what you see when it first drys, is not as dark as it will end up. You can always darken it up later but you cant lighten it easily...

Using the tea bag as a stamp pad I just blotted the doilies two at a time.

And then dried them with a hair dryer - if there was enough sun, I would have popped them in the sun to dry.

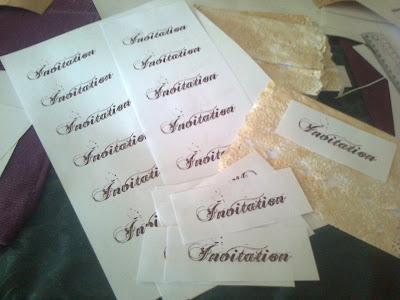
Once I had tinted all my doilies, I printed out the invitation wording, (left in the above picture) two invites to an A4 sheet of paper and cut the A4 in half - this gives you A5. I also used a colour that was brownish red to go with the tea tint.

I had planned to have the invitation as an A6 size (1/4 of an A4 page) so that the invitation unfolded to reveal its contents and still it fit into a standard envelope. So I cut my printed A4 sheet in half and then folded up the bottom of the doiley and inserted the printed invite. DON'T glue it yet.

Then I cut the top of the invite off so that it all fits neatly inside. (compare this photo with the above to see what I cut off) When you are designing the printed part, have a doily handy and print off a few drafts so that when you go to use up all the coloured ink - you know its going to fit. By folding up the bottom, I needed to cut off part of the top. I wasnt clever enough to figure out how to print the invite in the right spot not to have to cut anything off the top!...

Once you have the insert cut to size, glue it in with a glue stick. Some liquid glues will pucker up the delicate doily, which may enhance your shabby chic look, or it may not...

Glue the folded piece of the doily to the top of the printed invite as well.
Then using a ruler to get a straight fold line exactly where I wanted it - I folded the invite.
By using a 1/2 sheet of photocopy paper for the inside of the invite, I have made the invitation a bit stronger as doiley paper is quite delicate. The thicker the paper you use, the more robust your invitation will be.

The idea was to have the two edges meet. This will make your invitation an A6 which is a standard envelope size as well.

I made the invitation label for the front - probably a bit too big - see the difference between the plain paper and the tinted doily...

I glued the invitation label on to the front

And then aged it using the same technique as I did to tint the doily except that I used a paintbrush as i was working with a much smaller piece of paper. I discovered that the ink was waterproof (which I wasn't expecting) and so was able to drip my tea tint onto the writing as well.

Once everything was dry and glued together I cut a series of ribbon and glued them on the back of the invitation.

Tied the ribbon around the front of the invitation and tinted parts of it with the tea to age it as well.

Popped it into an envelope and posted them off!
There are some beautiful shabby chic invitation on the net for inspiration and mine are nothing like the fantastical ones that I fell in love with but nevertheless, still a lot of fun (and I think easier to make for those of us with very little patience!)
Its a bit fiddly getting the printed part to fit inside. You could always make the invitation with a blank inside and when they are finished, print off 4 invites to a page and cut them out to glue inside once its all made.
If you are a stamper, I can see all sorts of possibilities to add to the doilies to age or to decorate them!
Mine went down well with my guests and I'm already looking forward to the next afternoon tea party with the girls!
Green-ness: 3/5 Its probably greener to send an email invite. Also used new products that probably cant be used again for anything else.
Frugal-ness: 5/5 Cost me $2 for the doilies and $4 for the ribbon. I thought $6 for 24 handmade invitations was ok!
Time cost: Maybe 4 hours from whoa to go. I made them in about 3 spurts of just over an hour each.
Skill level: The invitation is easy enough, getting the printed piece in the right place too a fair bit of computor skill. Although once you've got it, you can save it, change the details and use it again.
Fun-ness: This was a wonderful project - I enjoyed every step of it!
Comments