

I have a couple of new nephews in the family and wanted to make a birthday present for one of them. I had thought of blocks for a while but wood was too hard for me to"make" them from and since he will more than likely put them in his mouth, they needed to be made of something that could be mouthed and them washed if necessary. I spotted this cool tutorial for cloth covered foam block and thought I'd give it a go...
Here's what I did...


Here's what I did...
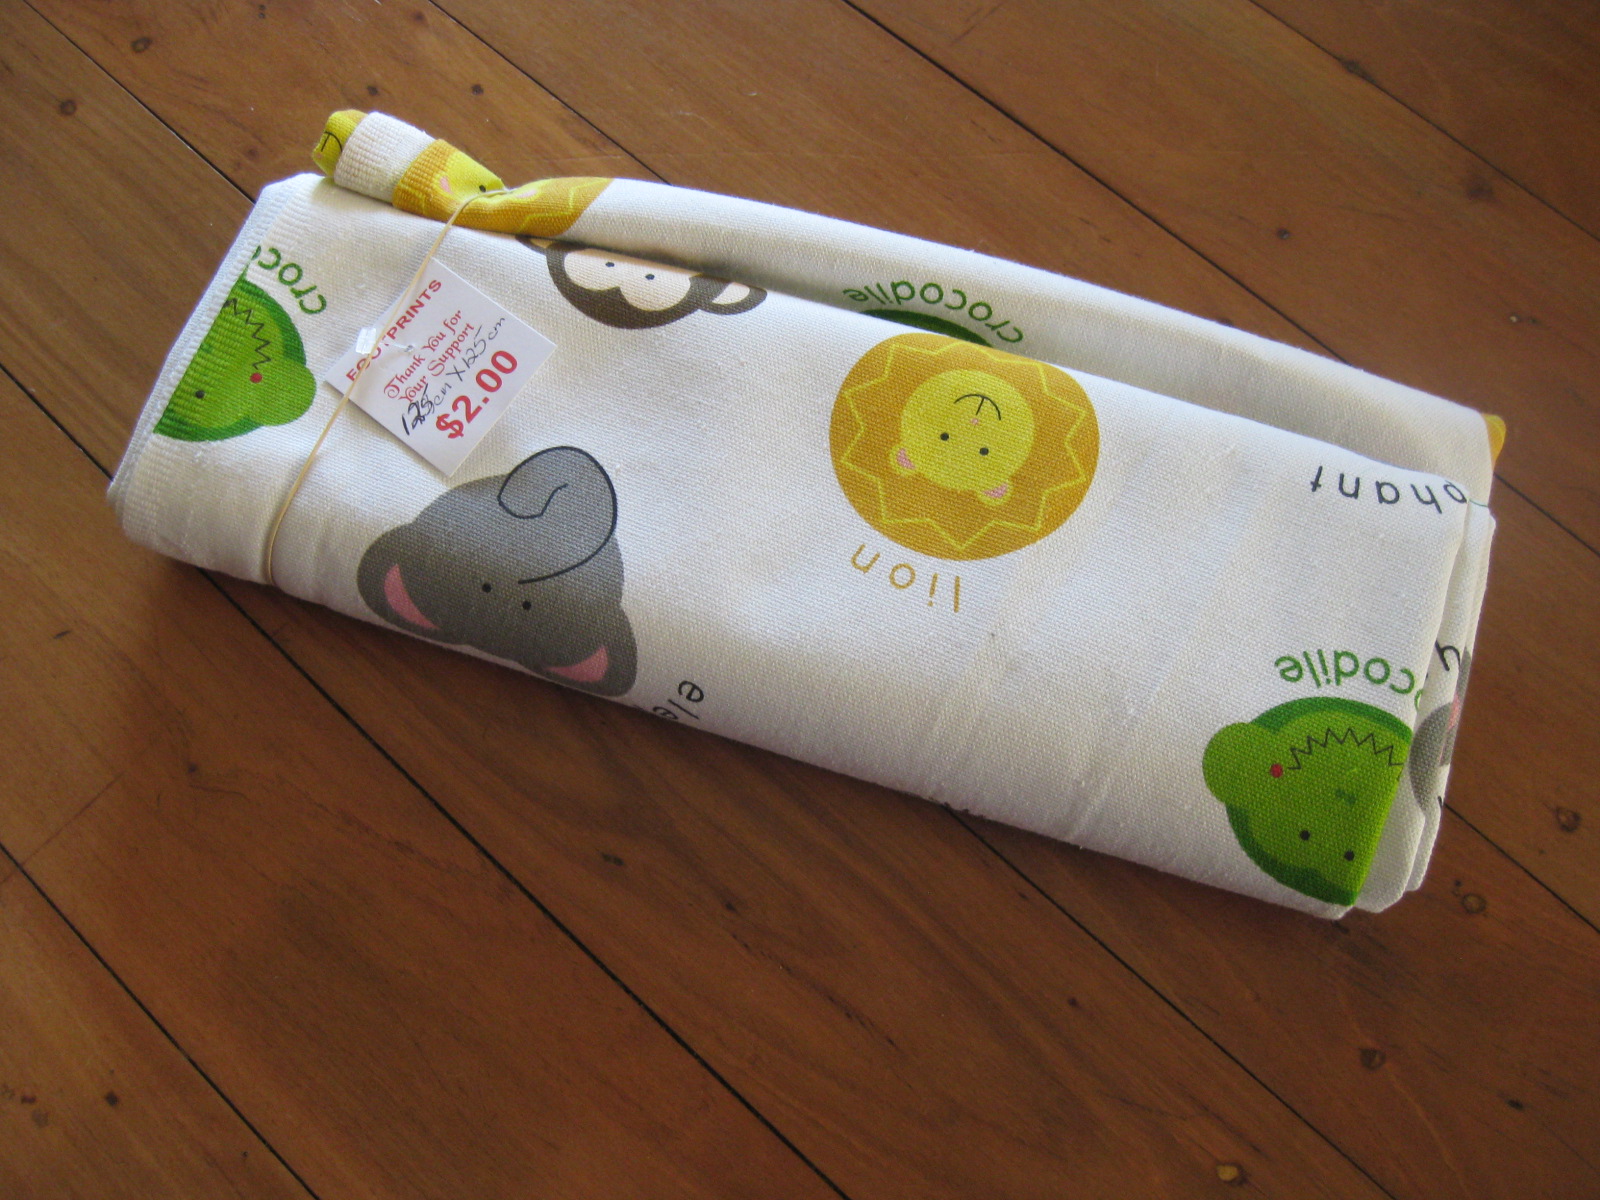
I bought a colourful animal print material from my favorite op shop for $2!

Then I went to the local rubber shop and bought a couple of off cuts for a couple of dollars as well. I bought this shaped piece so that I had as little cutting to do as possible - maths and straight lines are not my specialty!

Once i sat down to cut my squares out I realised my pattern was not on a grid pattern so I couldn't just cut 'em out! I cut a square of card that was the same shape as the front of one of those long pieces of foam and used it as a template.

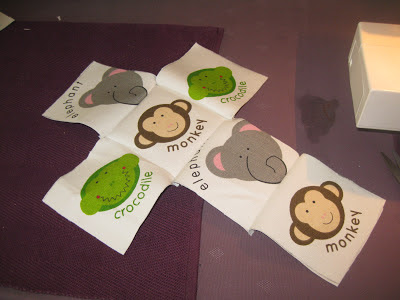
I centered the animal on the sides...

And then on the top and bottom...

Giving me a square with the animal centered in it.

You need 6 squares to make each cube. lay them out in a cross shape like this.

And then sew then into this cross shape, front sides together.

Like this.
My Elephant was too big to fit the whole thing in and so parts of him got the chop. I'm sure my 1 year old nephew wont be writing to complain about the missing parts of his elephant! And anyway, these "flaws" are part of the "charm" of the home made gift!

To make the cube up. Fold up two sides, pin and then sew them.

Like this!

Move around to the next side and keep going...

All the way around...

Until you have a box with a lid.

Sew up three sides, back stitching on the edges so they don't come apart when you stuff the foam cube inside.

Turn the cube right side out. Use a chopstick or blunt stick of some sort to poke the corners out. Scissors might poke all the way through unless you are very gentle resulting in having to turn it back inside out and resewing it!

Measure the front of your foam (hopefully you buy a piece that is roughly square) and then use that measurement to mark each side of the long piece to mark out your cube.

I used a decent kitchen knife to cut my cubes. The lady at the foam shop recommended an electric knife - but we don't have one...

Voila - one foam cube!

Squish up the foam and force it through the opening in your material cube and mess around with it until its sitting inside the material nice and snugly.

Like this!

Next - hand sew the cube shut.
Repeat for as many cubes as you want to make!

Stack and play with them!
I'm not the greatest sewer in the world and I tend to make things up as I go along. I found this wonderful blog with lots of sewing tips for making these block in. If you are new to sewing or just a straight line sewer like I am, this is a great tutorial to have a long look at before you start.
These are great for packing and posting as even though they are a bit bulky, they weigh next to nothing and so my postage is much cheaper than the equivalent wooden version! These can be put into the washing machine to be washed and left in the sun to dry once they have been thoroughly goobed on by the nephew! (I'm sure its a gesture of appreciation to be goobed upon by one so verbally unable to express his pleasure!)
They are nice and soft so if they fall or get thrown, they wont break any one or anything. I thought they were a wonderful idea for young children!
Score card:
Green-ness: 5/5 for using waste material to make a wonderful new item out of!
Frugal-ness: 5/5 for spending less than $5
Time cost: About 1/2 an hour to cut all the pieces for 6 blocks out (that bit is a bit fiddly) and about 10 minutes each to complete a block.
Skill level: Straight line sewing and needle threadinbg skills needed!
Fun-ness: great fun to create something as a gift for a young 'un! (and to have a play with them before you post them!)
Comments
www.oursimpleandmeaningfullife.blogspot.com
End of lease cleaning Sydney
End of lease cleaning
Bond cleaning